|
|

楼主 |
发表于 2023-6-28 13:23:28
|
显示全部楼层
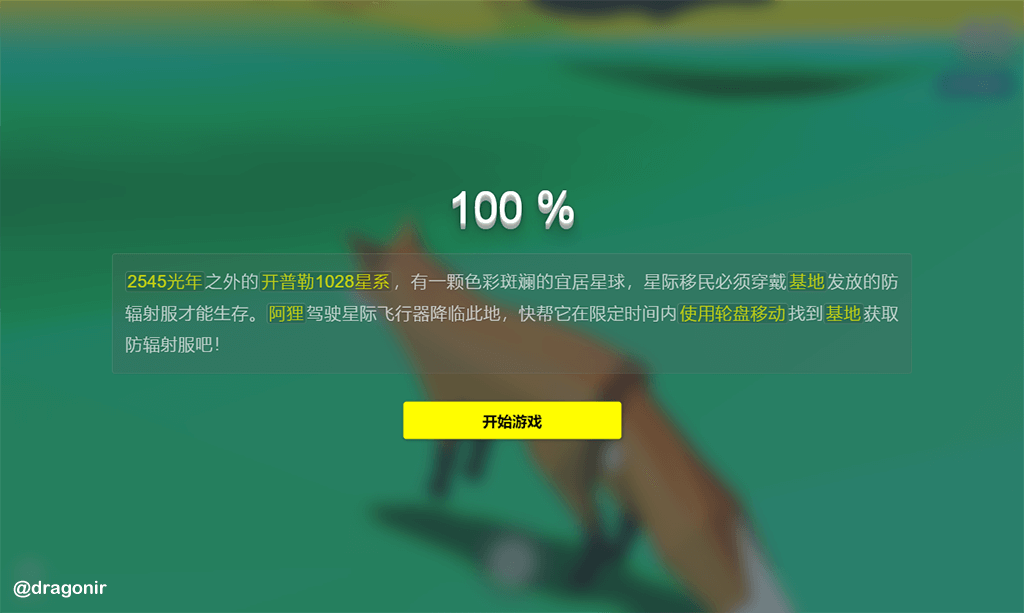
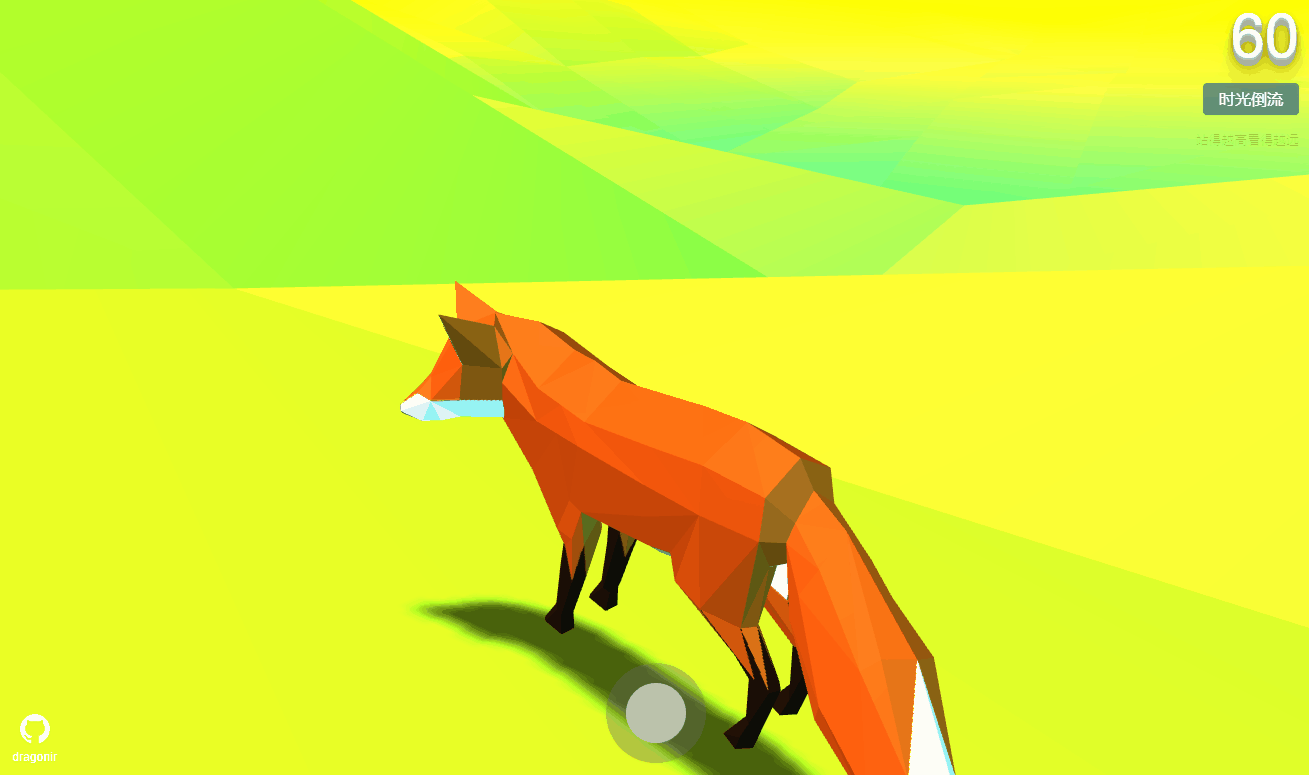
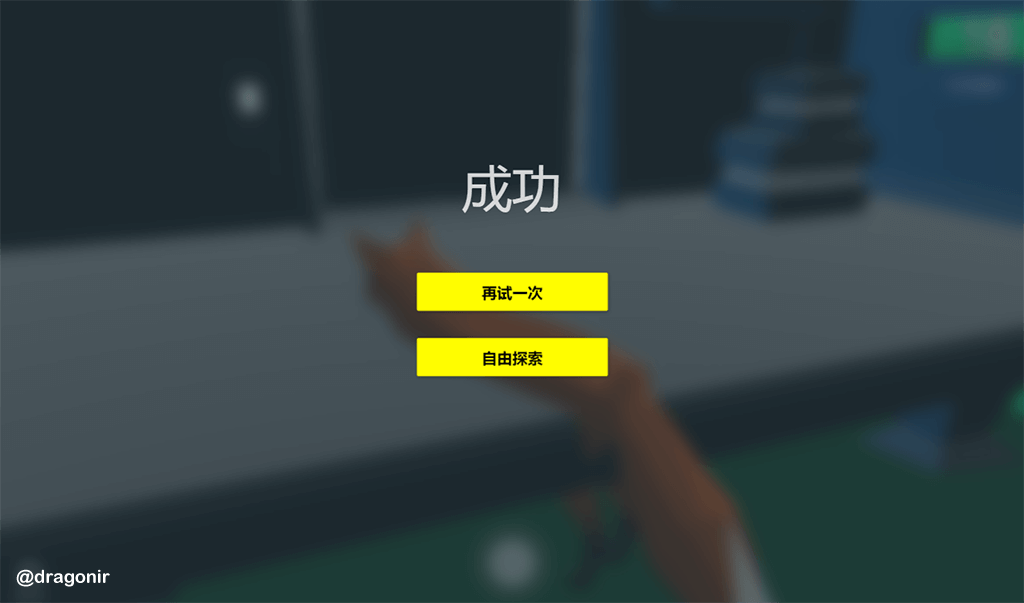
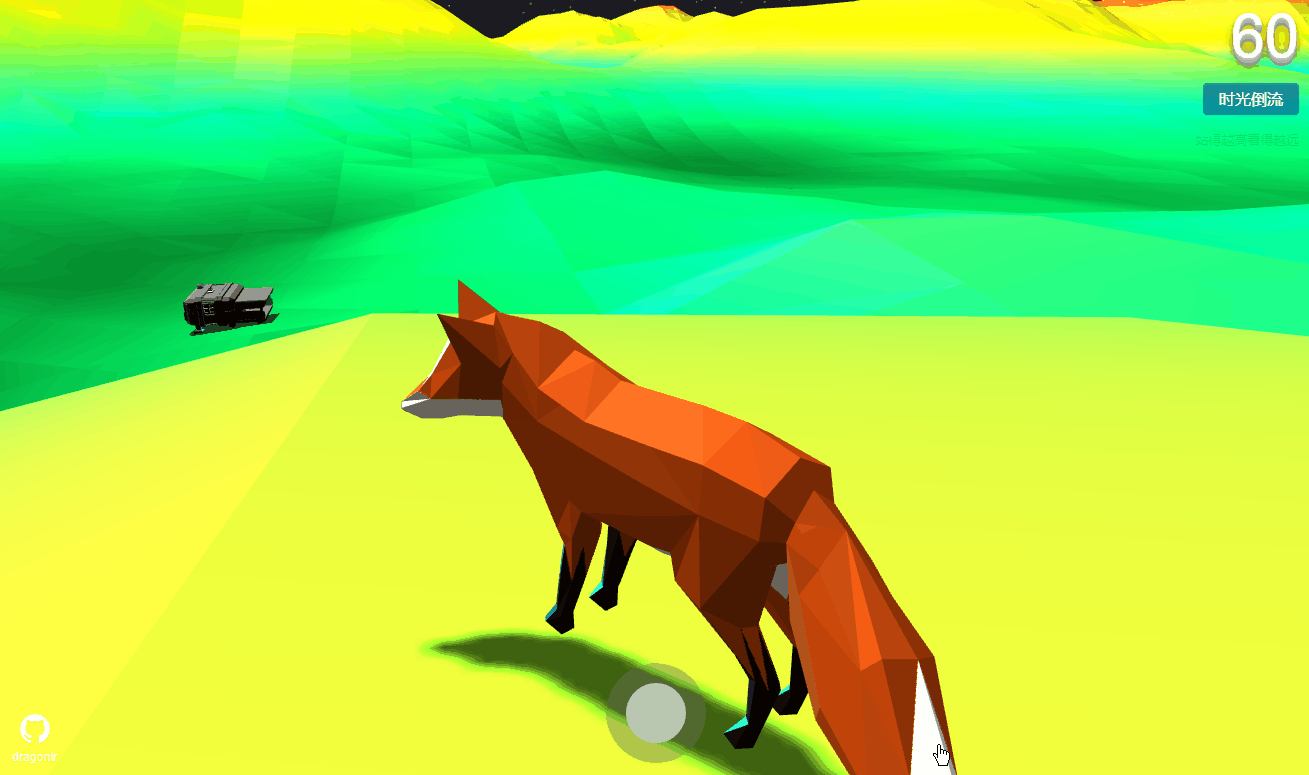
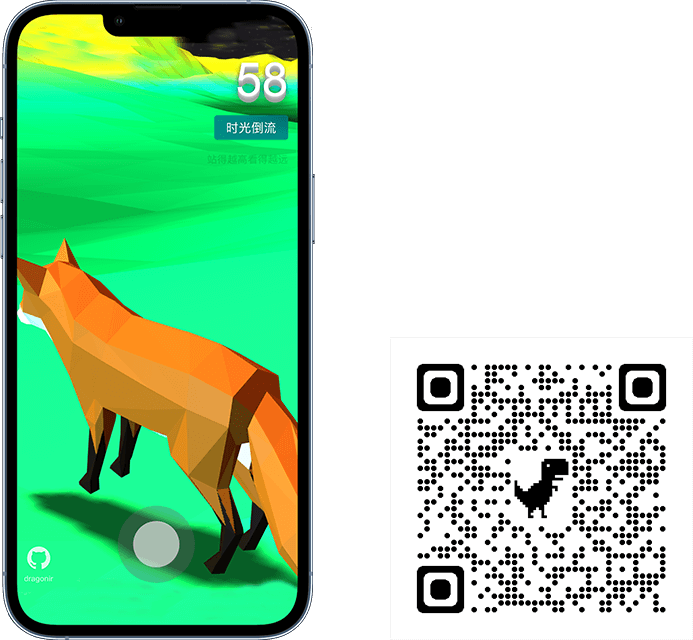
设计游戏流程如下图所示:页面加载完成后玩家 👨‍🚀 点击开始按钮,然后在限定时间内通过控制页面底部轮盘 🕹 移动模型,找到目标基地所在的位置。寻找成功或失败都会显示结果页 🏆,结果上面有两个按钮再试一次和自由探索,点击再试一次时间会重置,然后重新回到起点开始倒计时。点击自由探索则不在计时,玩家可以在 3D 开放世界里操作模型自由探索。同时,游戏内页面也提供一个时光倒流按钮,它的作用是玩家 👨‍🚀 可以在失败前自己手动重置倒计时 ⏳,重新回到起点开始游戏。

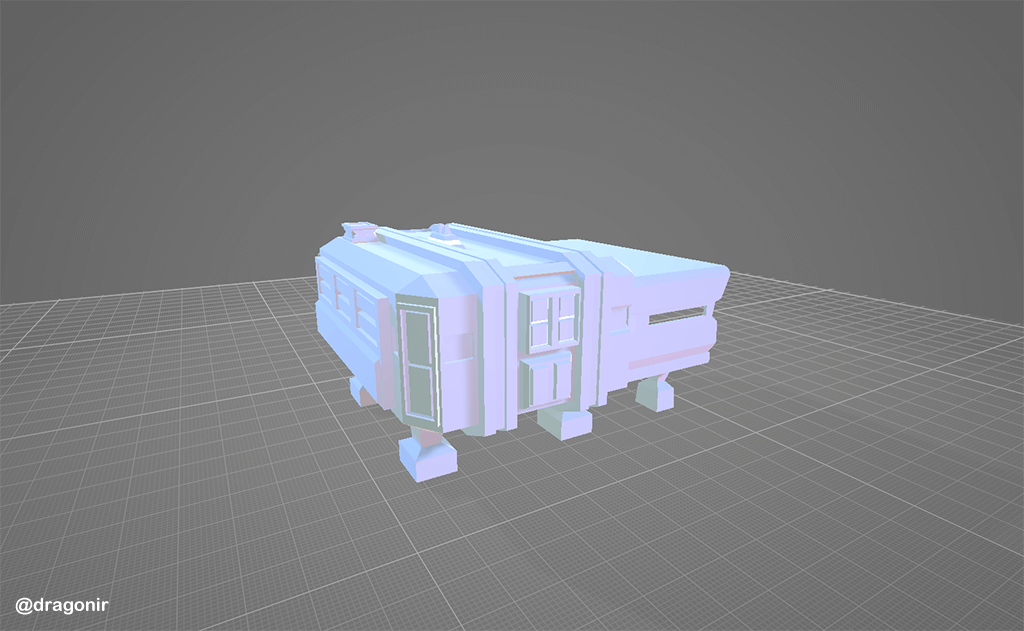
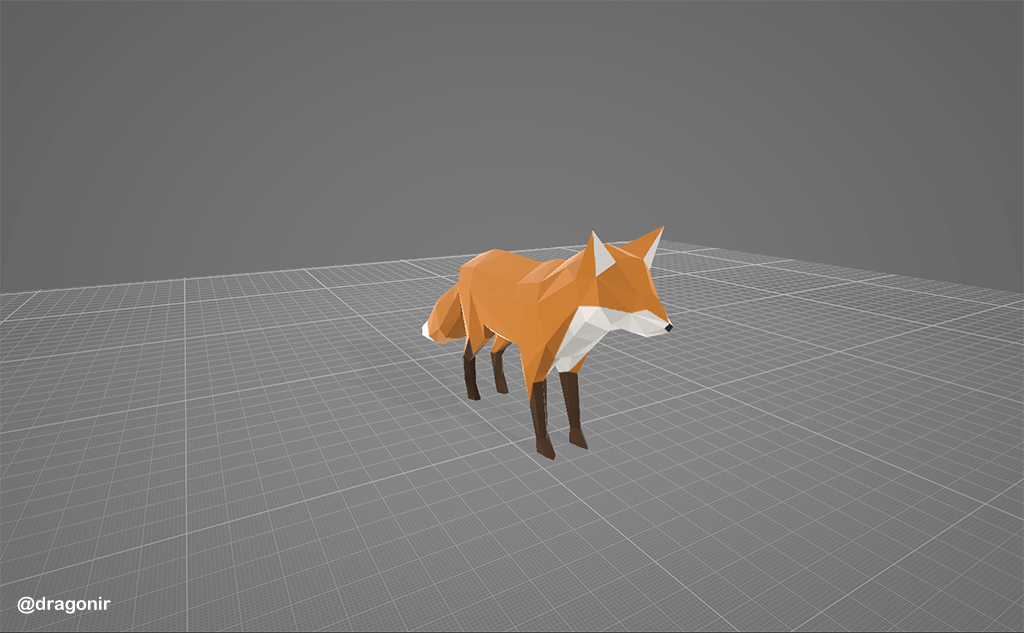
实现加载资源加载开发所需的必备资源:GLTFLoader 用于加载狐狸 🦊 和基地 🏠 模型、CANNON 是用于创建 3D 世界的物理引擎;CannonHelper 是对 CANNON 一些使用方法的封装;JoyStick 用于创建通过监听鼠标移动位置或触碰屏幕产生的位移来控制模型移动的轮盘 🕹。
import * as THREE from 'three';import { GLTFLoader } from 'three/examples/jsm/loaders/GLTFLoader';import CANNON from 'cannon';import CannonHelper from './scripts/CannonHelper';import JoyStick from './scripts/JoyStick';页面结构页面结构比较简单,.webgl 用于渲染 WEBGL;.tool 是游戏内的工具栏,用于重置游戏和显示一些提示语;.loading 是游戏加载页面,用来显示游戏加载进度、介绍游戏规则、显示游戏开始按钮;.result 是游戏结果页面,用于显示游戏成功或失败结果,并提供再试一次和自由探索两个按钮 🔘。
(<div id="metaverse"> <canvas className='webgl'></canvas> <div className='tool'> <div className='countdown'>{ this.state.countdown }</div> <button className='reset_button' onClick={this.resetGame}>时光倒流</button> <p className='hint'>站得越高看得越远</p> </div> { this.state.showLoading ? (<div className='loading'> <div className='box'> <p className='progress'>{this.state.loadingProcess} %</p> <p className='description'>游戏描述</p> <button className='start_button' style={{'visibility': this.state.loadingProcess === 100 ? 'visible' : 'hidden'}} onClick={this.startGame}>开始游戏</button> </div> </div>) : '' } { this.state.showResult ? (<div className='result'> <div className='box'> <p className='text'>{ this.state.resultText }</p> <button className='button' onClick={this.resetGame}>再试一次</button> <button className='button' onClick={this.discover}>自由探索</button> </div> </div>) : '' }</div>)数据初始化数据变量包括加载进度、是否显示加载页面、是否显示结果页、结果页文案、倒计时、是否开启自由探索等。
state = { loadingProcess: 0, showLoading: true, showResult: false, resultText: '失败', countdown: 60, freeDiscover: false}场景初始化初始化场景 🏔、相机 📷、光源 💡。
const renderer = new THREE.WebGLRenderer({ canvas: document.querySelector('canvas.webgl'), antialias: true, alpha: true});renderer.setSize(window.innerWidth, window.innerHeight);renderer.setPixelRatio(Math.min(window.devicePixelRatio, 2));renderer.shadowMap.enabled = true;renderer.shadowMap.type = THREE.PCFSoftShadowMap;const scene = new THREE.Scene();// 添加主相机const camera = new THREE.PerspectiveCamera(45, window.innerWidth / window.innerHeight, .01, 100000);camera.position.set(1, 1, -1);camera.lookAt(scene.position);// 添加环境光const ambientLight = new THREE.AmbientLight(0xffffff, .4);scene.add(ambientLight)// 添加平行光var light = new THREE.DirectionalLight(0xffffff, 1);light.position.set(1, 1, 1).normalize();scene.add(light);💡 Three.js 阴影类型本文使用了 THREE.PCFSoftShadowMap 以开启效果更加柔和的阴影,Three.js 提供以下几种阴影类型:
- THREE.BasicShadowMap:提供未经过滤的阴影贴图,性能最快,但质量最低。
- THREE.PCFShadowMap:使用 Percentage-Closer Filtering (PCF) 算法过滤阴影贴图,是默认类型。
- THREE.PCFSoftShadowMap:使用 PCF 算法过滤的更加柔和的阴影贴图,尤其是在使用低分辨率阴影贴图时。
- THREE.VSMShadowMap:使用方差阴影贴图 VSM 算法过滤的阴影贴图。 使用 VSMShadowMap 时,所有阴影接收者也会投射阴影。
创建世界使用 Cannon.js 初始化物理世界 🌏。
// 初始化物理世界const world = new CANNON.World();// 在多个步骤的任意轴上测试刚体的碰撞world.broadphase = new CANNON.SAPBroadphase(world);// 设置物理世界的重力为沿y轴向上-10米每二次方秒world.gravity.set(0, -10, 0);// 创建默认联系材质world.defaultContactMaterial.friction = 0;const groundMaterial = new CANNON.Material("groundMaterial");const wheelMaterial = new CANNON.Material("wheelMaterial");const wheelGroundContactMaterial = new CANNON.ContactMaterial(wheelMaterial, groundMaterial, { // 摩擦系数 friction: 0, // 恢复系数 restitution: 0, // 接触刚度 contactEquationStiffness: 1000});world.addContactMaterial(wheelGroundContactMaterial);💡 Cannon.jsCannon.js 是用 JavaScript 实现的物理引擎库,可以与任何支持浏览器的渲染或游戏引擎,可以用于模拟刚体,实现 3D 世界 🌏 中更加真实的物理形式的移动和交互。更多 Cannon.js 相关 API 文档和示例可以参考文章末尾链接。
创建星空创建 1000 个粒子用于模型星空 ✨,并将它们添加到场景中。本示例中通过着色器形式创建粒子,这样更有利于 GPU 渲染效率。
const textureLoader = new THREE.TextureLoader();const shaderPoint = THREE.ShaderLib.points;const uniforms = THREE.UniformsUtils.clone(shaderPoint.uniforms);uniforms.map.value = textureLoader.load(snowflakeTexture);for (let i = 0; i < 1000; i++) { sparkGeometry.vertices.push(new THREE.Vector3());}const sparks = new THREE.Points(new THREE.Geometry(), new THREE.PointsMaterial({ size: 2, color: new THREE.Color(0xffffff), map: uniforms.map.value, blending: THREE.AdditiveBlending, depthWrite: false, transparent: true, opacity: 0.75}));sparks.scale.set(1, 1, 1);sparks.geometry.vertices.map(spark => { spark.y = randnum(30, 40); spark.x = randnum(-500, 500); spark.z = randnum(-500, 500); return true;});scene.add(sparks);
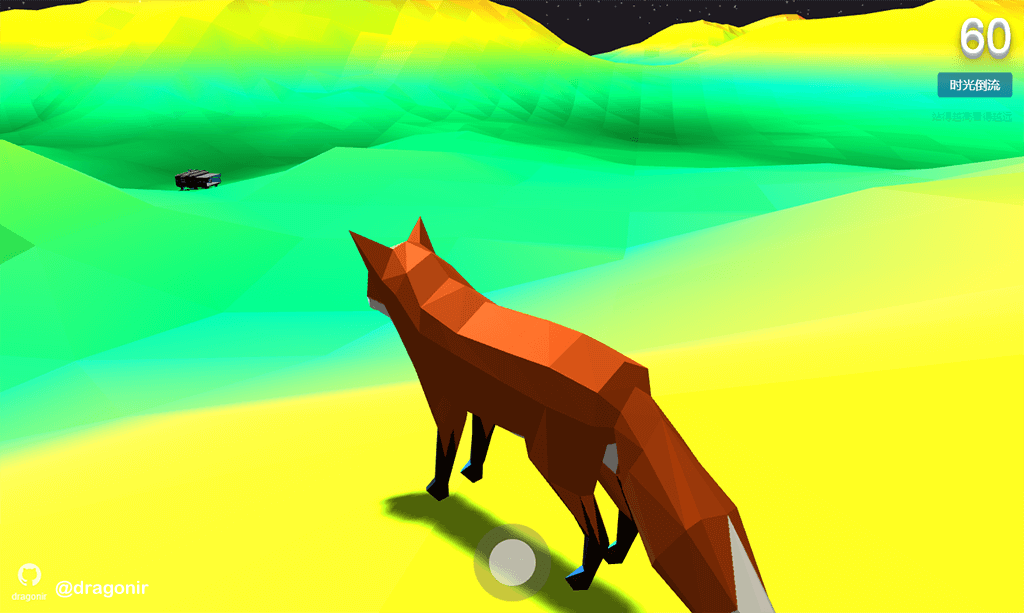
创建地形通过 CANNON.Heightfield 高度场创建 128 x 128 x 60 可视化渐变色地形。地形的凹凸起伏状态是通过以下高度图 HeightMap 实现,它是一张黑白图片 🖼,通过像素点的颜色深浅来记录高度信息,根据高度图数据信息创建地形网格。可通过文章末尾提供的链接在线生成随机高度图。地形生成完成并将它添加到世界 🌏 中,然后在 animate 方法中页面重绘时调用 check 方法,用于检测和更新模型在地形上的位置。
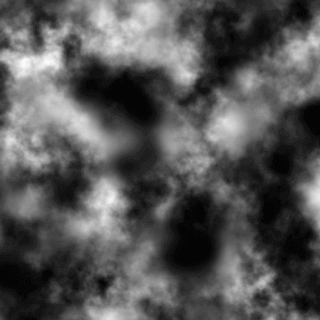
const cannonHelper = new CannonHelper(scene);var sizeX = 128, sizeY = 128, minHeight = 0, maxHeight = 60, check = null;Promise.all([ // 加载高度图 img2matrix.fromUrl(heightMapImage, sizeX, sizeY, minHeight, maxHeight)(),]).then(function (data) { var matrix = data[0]; // 地形体 const terrainBody = new CANNON.Body({ mass: 0 }); // 地形形状 const terrainShape = new CANNON.Heightfield(matrix, { elementSize: 10 }); terrainBody.addShape(terrainShape); // 地形位置 terrainBody.position.set(-sizeX * terrainShape.elementSize / 2, -10, sizeY * terrainShape.elementSize / 2); // 设置从轴角度 terrainBody.quaternion.setFromAxisAngle(new CANNON.Vec3(1, 0, 0), -Math.PI / 2); world.add(terrainBody); // 将生成的地形刚体可视化 cannonHelper.addVisual(terrainBody, 'landscape'); var raycastHelperGeometry = new THREE.CylinderGeometry(0, 1, 5, 1.5); raycastHelperGeometry.translate(0, 0, 0); raycastHelperGeometry.rotateX(Math.PI / 2); var raycastHelperMesh = new THREE.Mesh(raycastHelperGeometry, new THREE.MeshNormalMaterial()); scene.add(raycastHelperMesh); // 使用 Raycaster检测并更新模型在地形上的位置 check = () => { var raycaster = new THREE.Raycaster(target.position, new THREE.Vector3(0, -1, 0)); var intersects = raycaster.intersectObject(terrainBody.threemesh.children[0]); if (intersects.length > 0) { raycastHelperMesh.position.set(0, 0, 0); raycastHelperMesh.lookAt(intersects[0].face.normal); raycastHelperMesh.position.copy(intersects[0].point); } target.position.y = intersects && intersects[0] ? intersects[0].point.y + 0.1 : 30; var raycaster2 = new THREE.Raycaster(shelterLocation.position, new THREE.Vector3(0, -1, 0)); var intersects2 = raycaster2.intersectObject(terrainBody.threemesh.children[0]); shelterLocation.position.y = intersects2 && intersects2[0] ? intersects2[0].point.y + .5 : 30; shelterLight.position.y = shelterLocation.position.y + 50; shelterLight.position.x = shelterLocation.position.x + 5 shelterLight.position.z = shelterLocation.position.z; }});
💡 CANNON.Heightfield本示例中凹凸不平的地形是通过 CANNON.Heightfield 实现的,它是 Cannon.js 物理引擎的高度场。在物理学中把某个物理量在空间中一个区域内的分布称为场,高度场就是与高度相关的场。Heightfield 的高度就是关于两个变量的函数,可以表达为 HEIGHT(i,j)。
Heightfield(data, options)- data 是一个 y值 数组,将用于构建地形。
- options 是一个配置项,有三个可配置参数:
- minValue 是数据数组中数据点的最小值。如果未给出,将自动计算。
- maxValue 最大值。
- elementSize 是 x轴 方向上数据点之间的世界间距。
|
|


 IP卡
IP卡 狗仔卡
狗仔卡 发表于 2023-6-28 13:22:29

 提升卡
提升卡 置顶卡
置顶卡 沉默卡
沉默卡 喧嚣卡
喧嚣卡 变色卡
变色卡 显身卡
显身卡